
Hello crafty reader! Yesterday I posted my paper fan project. There's some story behind it, and now I'm really glad that I am able to share with you the tutorial today. Here are a couple more paper fans that I made:

This tutorial will only cover the basic steps, as there are many ways to embellish this paper fan. Here are the materials you will need:
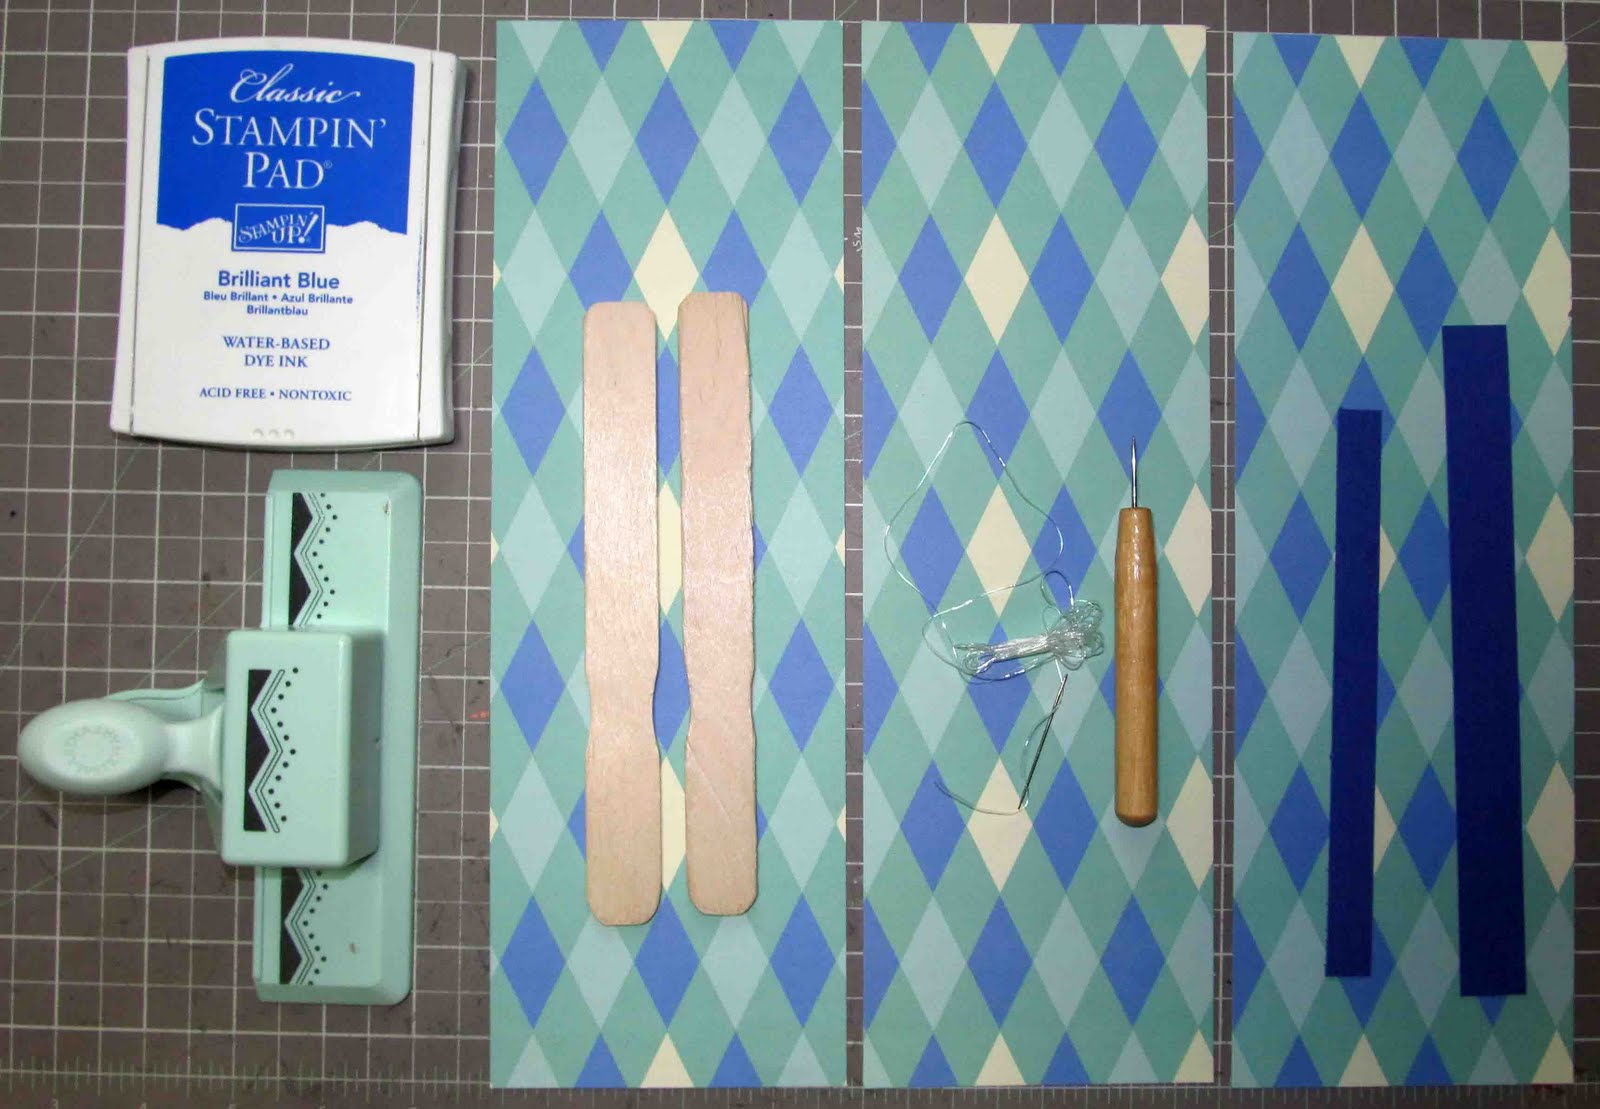
- Two 7" paddle sticks, or something similar. I'm basing my measurements from the ones by Tree House Studio bought from Hobby Lobby.
- Three pieces of double-sided designer paper, measured at 4 x 12 inches.
- Paper piercer or similar. The one I used is actually a paper quilling tool.
- Stretchable cord or wire, oftenly used for Jewelry making.
- Needle big enough for your stretch cord to go through.
- Cardstock cut at 1/2 x 6 and 3/8 inches. We will call this Cardstock A.
- Cardstock cut at 3/4 x 7 and 5/8 inches. We will call this Cardstock B.
- Bone folder and/or scoring tool.
- Your adhesive of choice. I used Scotch ATG and Zips Clear Adhesive Lines.
- Optional: ink and edge punch to match your designer paper.
For the designer paper, score all 3 pieces at 3/4 inches from left to right:

For Cardstock A, we will score each end at 3 inches, leaving 3/8" gap in between:

For Cardstock B, we will score each end at 3.5 inches, leaving 5/8" gap in between:

Now we can put our embossing tool away. It's time to fold our designer paper like this:

After that, we will adhere them together. We will call this our main piece.

Scrunching our main piece, we will apply adhesive to secure one end:

Then we will pierce a hole:

And with a needle and stretch cord, we will totally secure this end of the main piece:

Tie a knot three times:

*Side note: It's easier to pierce a hole and tie a stretch cord on your main piece before you apply the adhesive.
Next step: generously apply adhesive on Carstock A and attach to the secured end of our main piece. Here, I would add more glue to really secure the main piece to Cardstock A.

This is how your main piece should look like:

Next step: apply adhesive on both ends of your main piece, and attach the handles on both sides like so:

At this stage, you can punch each end of your Cardstock B, or leave it as is:

Apply adhesive (generously) on Cardstock B, and attach to the main piece:

For closure, I just used a small clear rubber band:

This is how it looks like opened:


And that's it... we're done! Easy, right? Once you've made your first paper fan, it's a breeze to do the next ones.
I would love to know what you think, especially if it worked for you or not. When you do give this a shot, please give credit and link back to Tinker Planet.
'Til next blog!
1 comment:
Great fans, thank you for the tutorial
Post a Comment